
Overview
You'll be cloning, pushing, and pulling from git.gccis.rit.edu constantly this semester, starting with your first project repo and continuing all the way through. Authenticating with just your username/password over HTTPS doesn't work directly with git anymore; you need either an SSH key or a Personal Access Token (PAT) instead.
If you're on Windows, Git for Windows ships with Git Credential Manager, which pops up a browser login the first time you push or pull and caches your credentials after that — so this is optional for you, but still more convenient once set up (no browser popups at all). If you're on Linux or macOS, you'll need to set up one of these two before you can clone anything.
SSH Keys
An SSH key is a matched pair of files: a private key that stays on your machine, and a public key you upload to GitLab. Once set up, cloning with an git@git.gccis.rit.edu:... URL just works, no password or token prompt, ever.
Windows: run these commands in Git Bash (installed alongside Git for Windows), not PowerShell or Command Prompt. macOS/Linux: any terminal works — ssh-keygen and ssh are already built in.
-
Check whether you already have a key pair:
cd ~/.ssh then ls -la, looking for
id_ed25519.pub (or id_rsa.pub). If one
exists, skip to step 3.
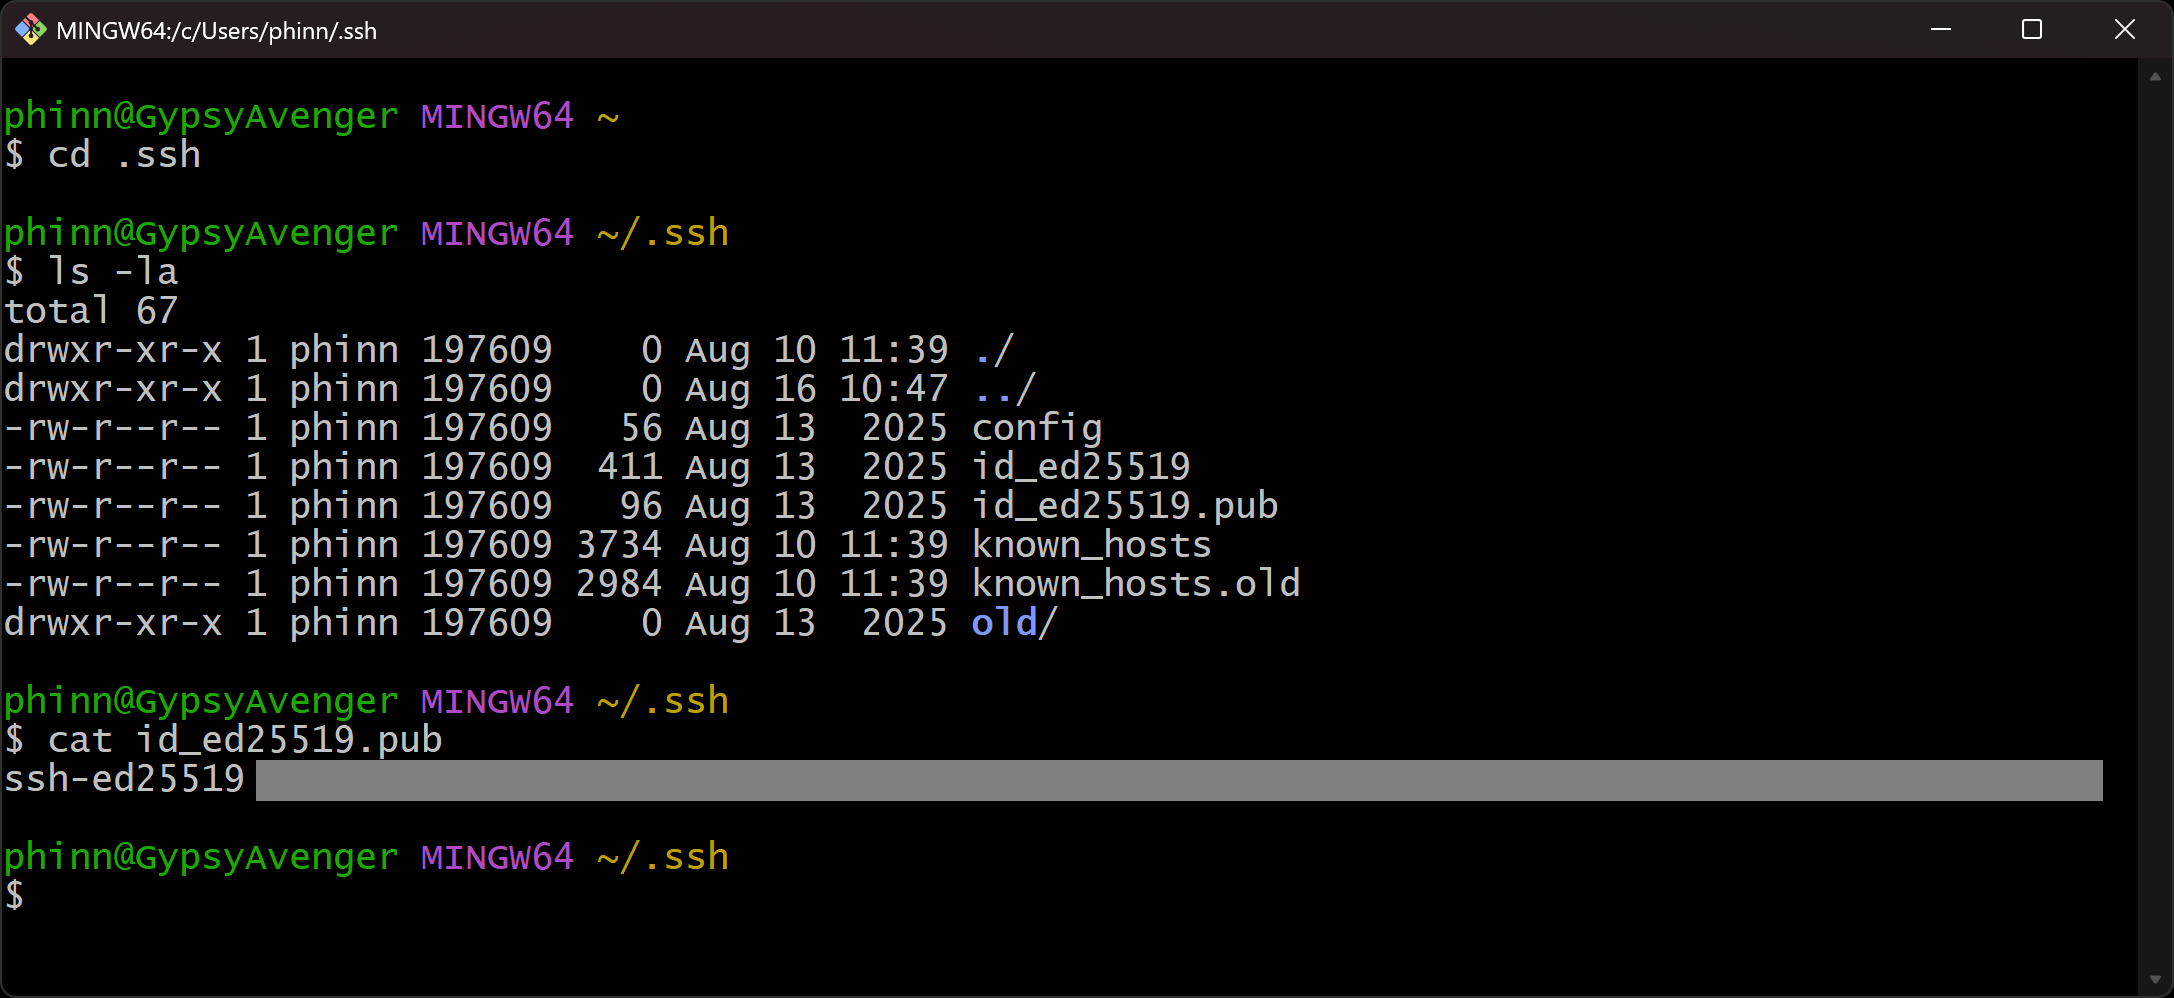
Checking for an existing key, then printing the public half. - Generate a new key pair: ssh-keygen -t ed25519 -C "your_email@rit.edu". Accept the default file location, and a passphrase is optional (recommended, but not required for this course).
- Copy your public key: cat ~/.ssh/id_ed25519.pub, and copy the whole output.
-
In GitLab, click your profile picture (top right)
and choose Edit profile.
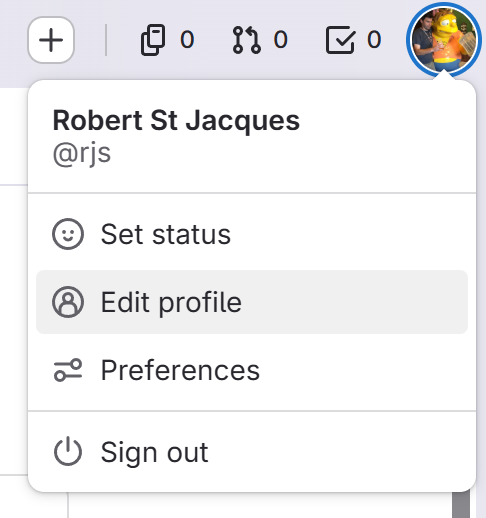
Profile picture → Edit profile. -
In the left menu, expand Access, then click
SSH keys.
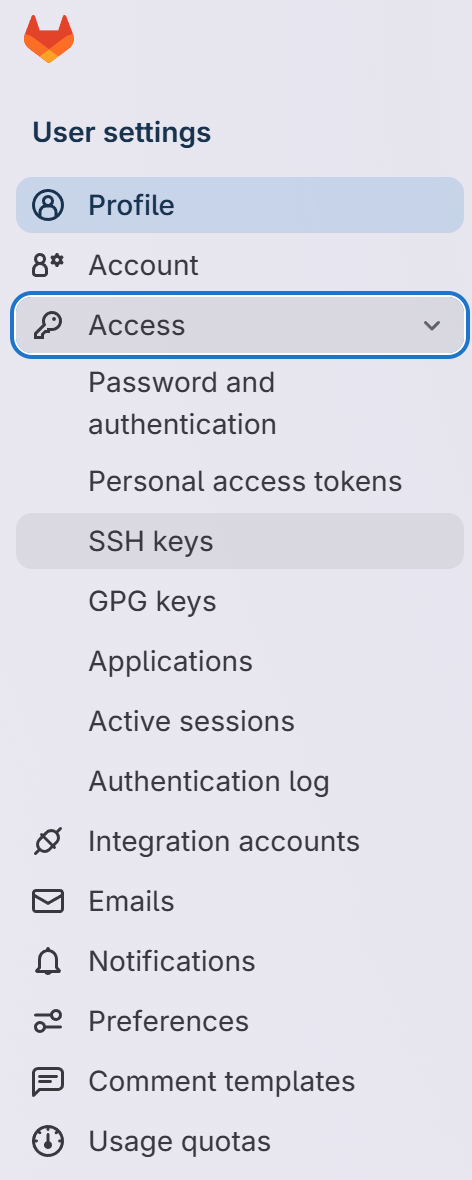
User Settings → Access → SSH keys. -
Click Add new key.
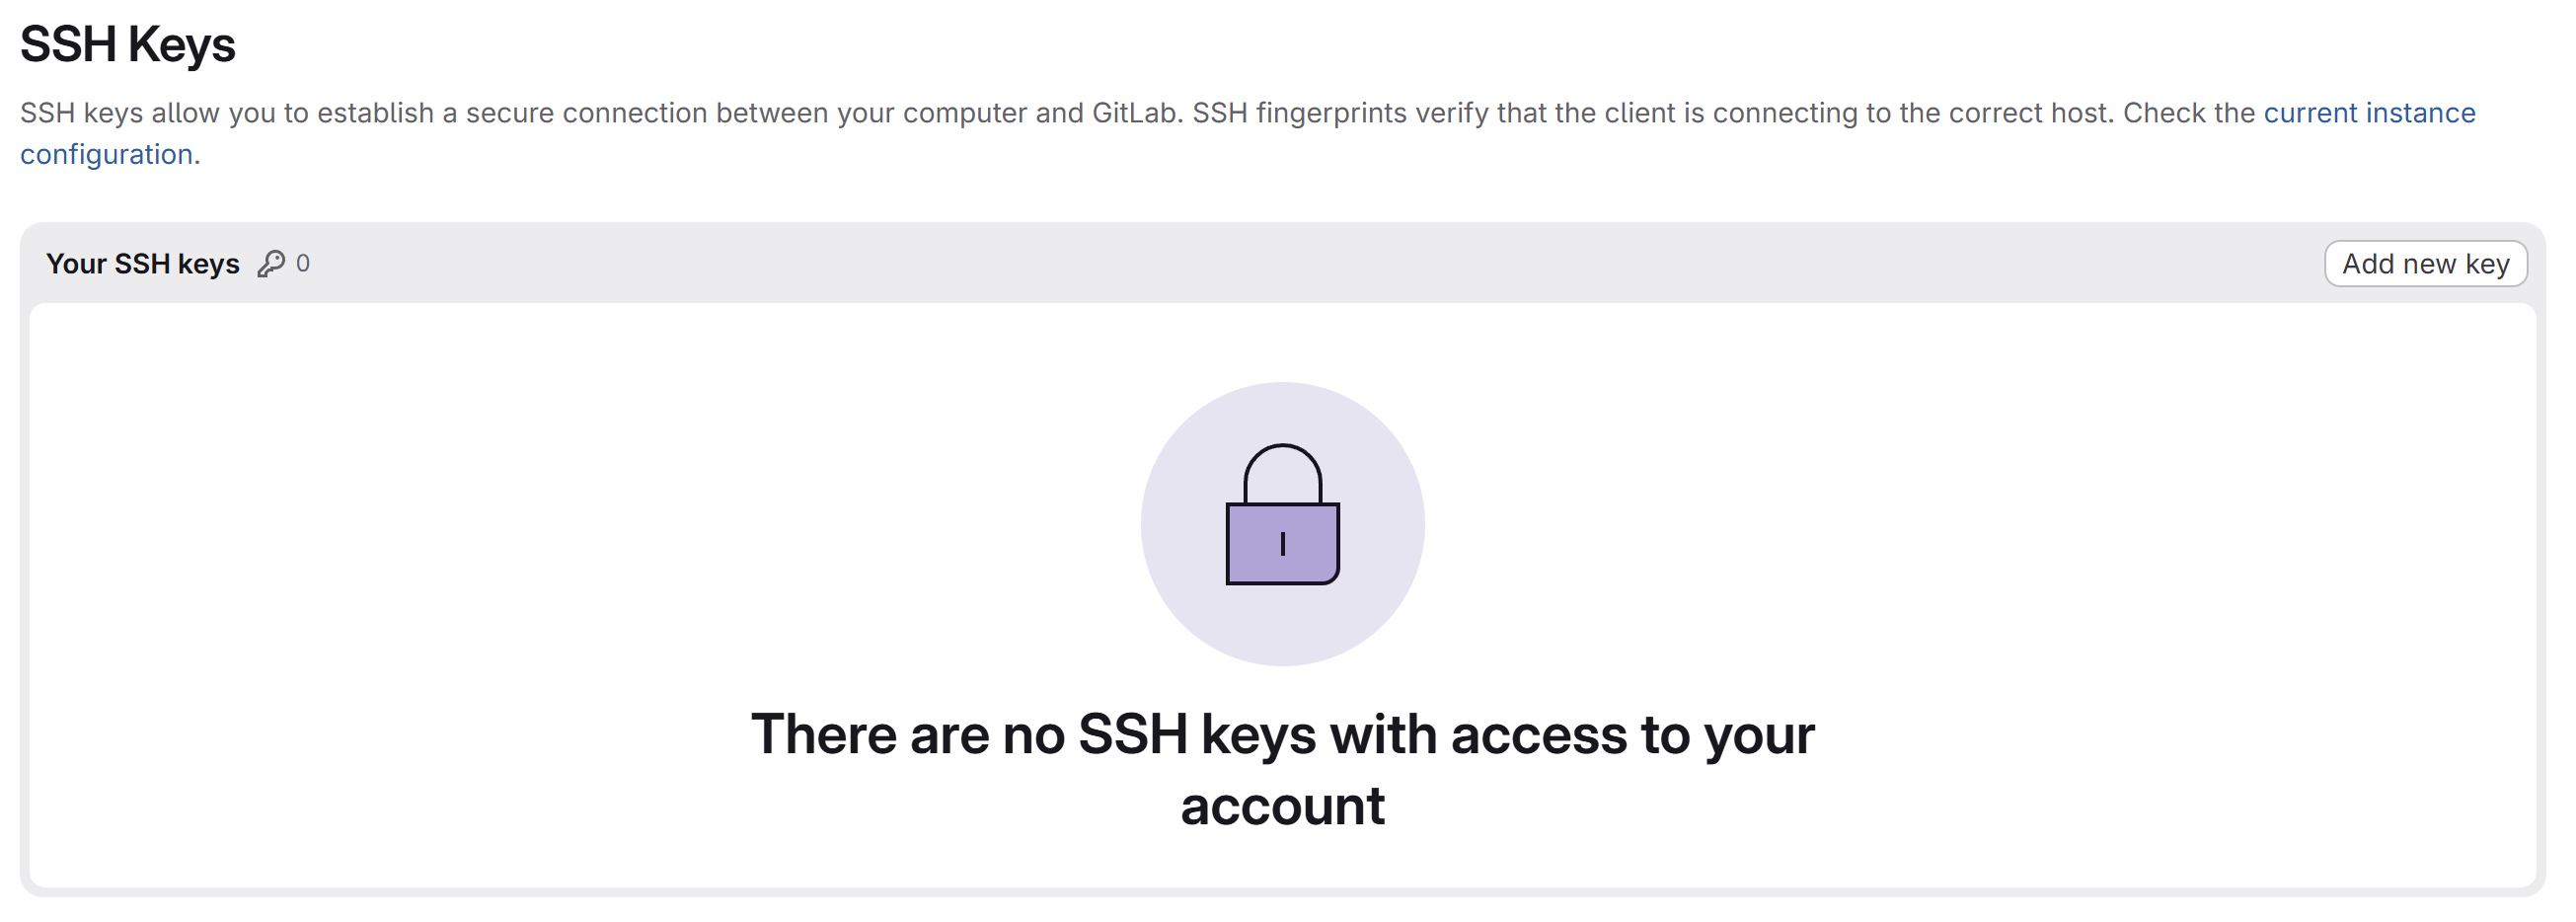
No keys yet — click Add new key. -
Paste your public key, give it a title, and click Add
key. Usage type defaults to "Authentication &
Signing," which is correct — leave it. Expiration date is
optional; leaving it blank means the key never expires, which is
fine for this course.
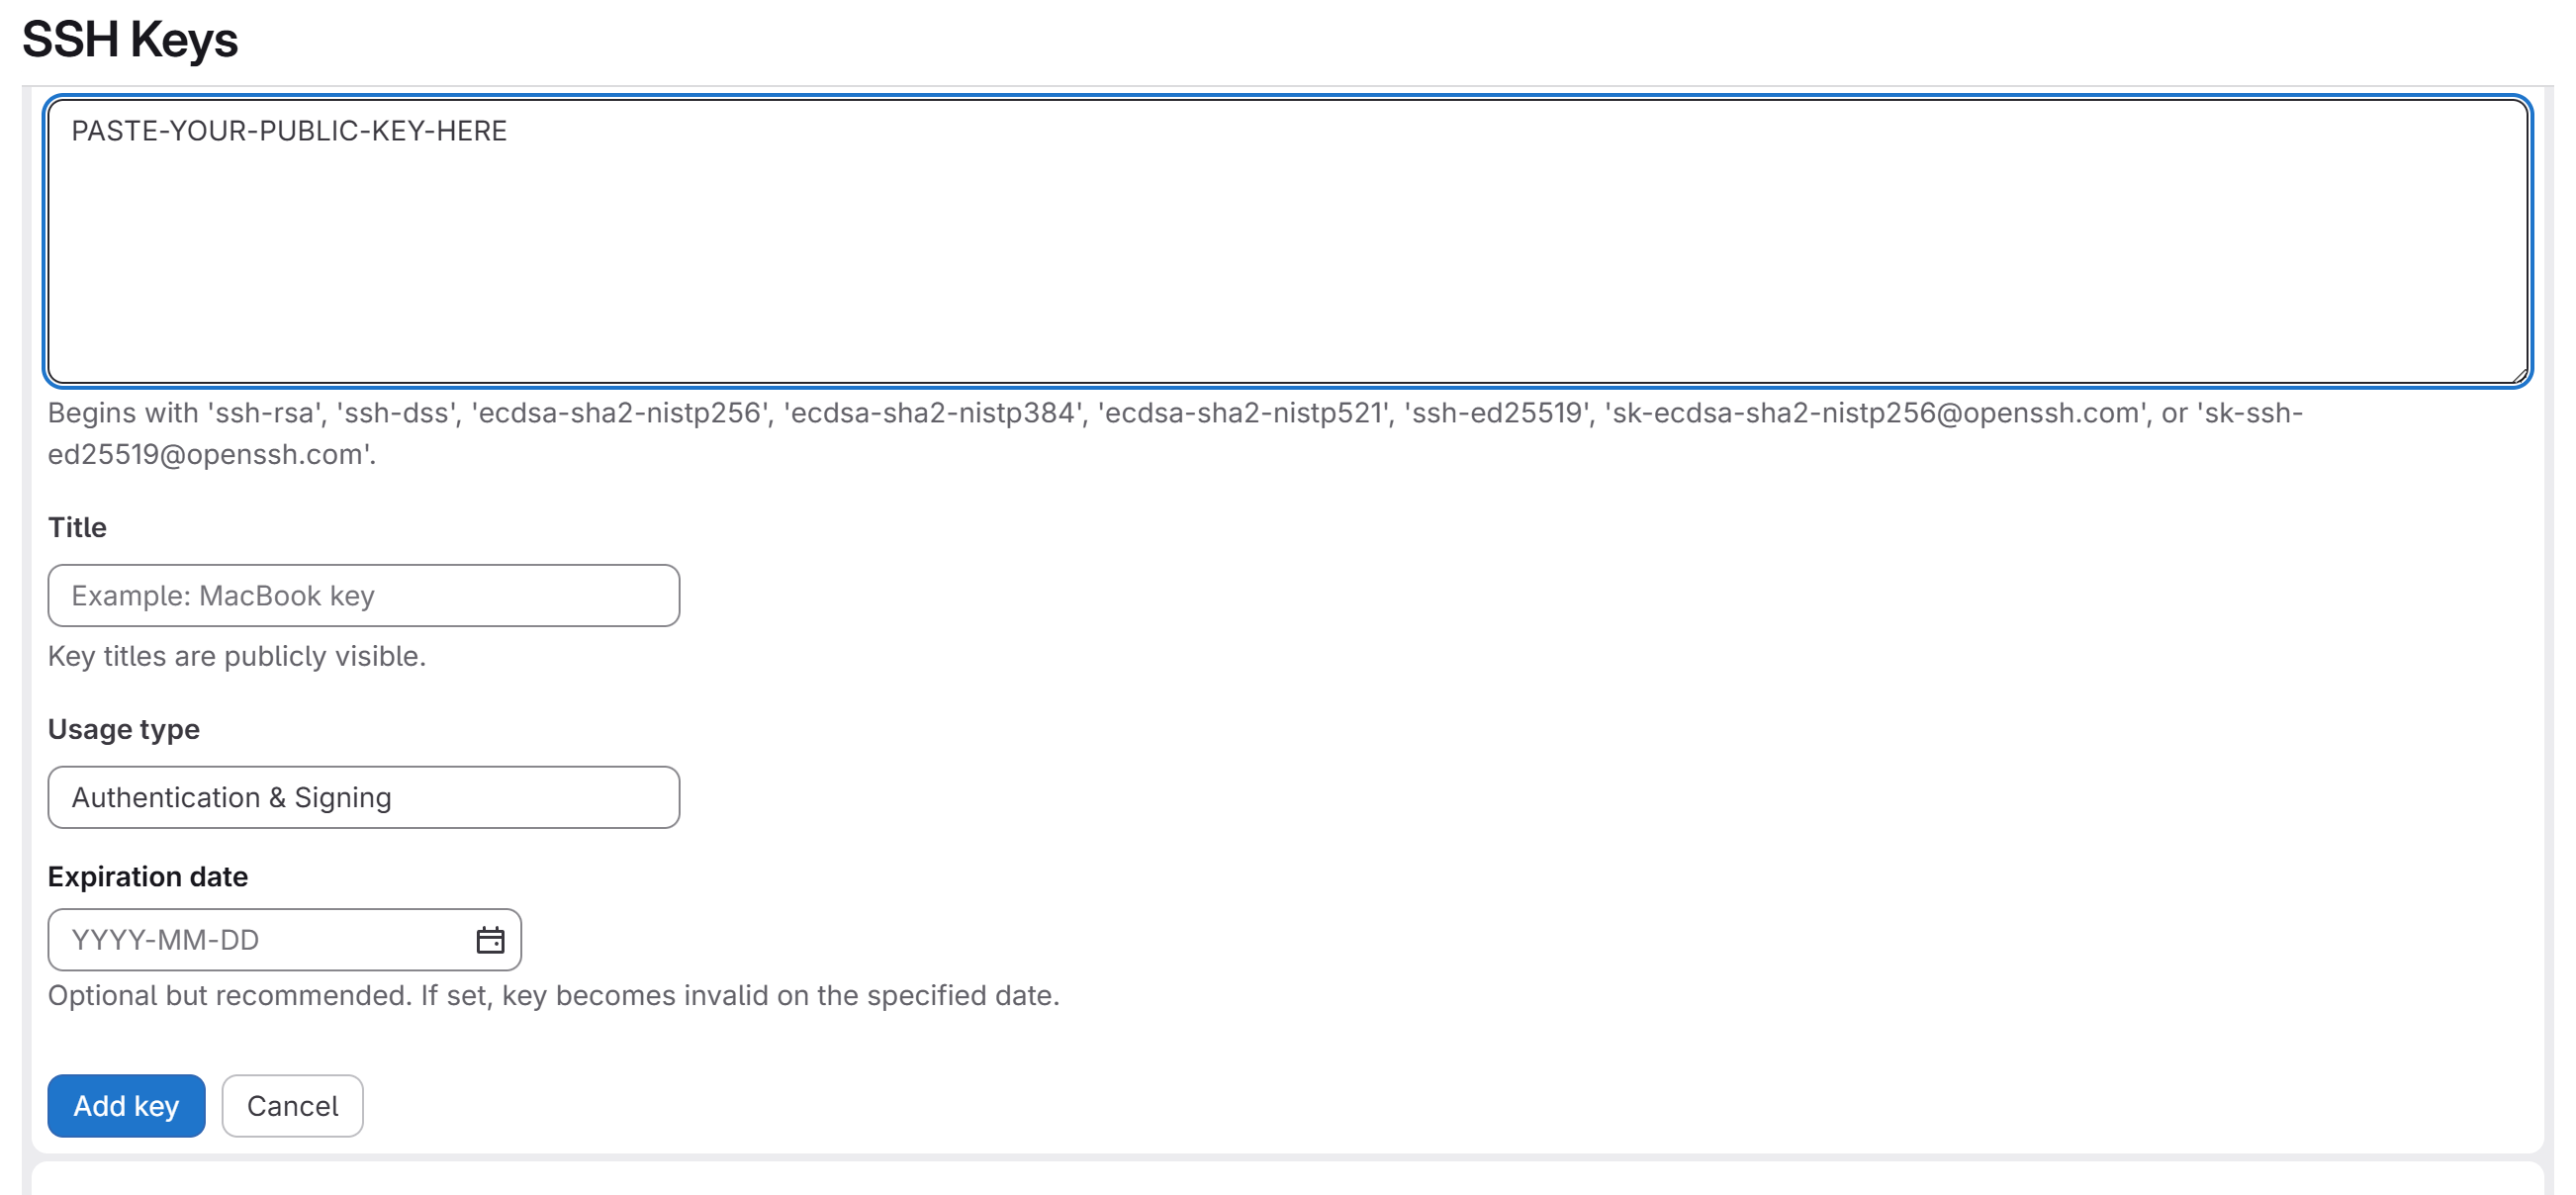
Paste the key, name it, and add it — expiration is optional. -
Your key now shows up in the list.
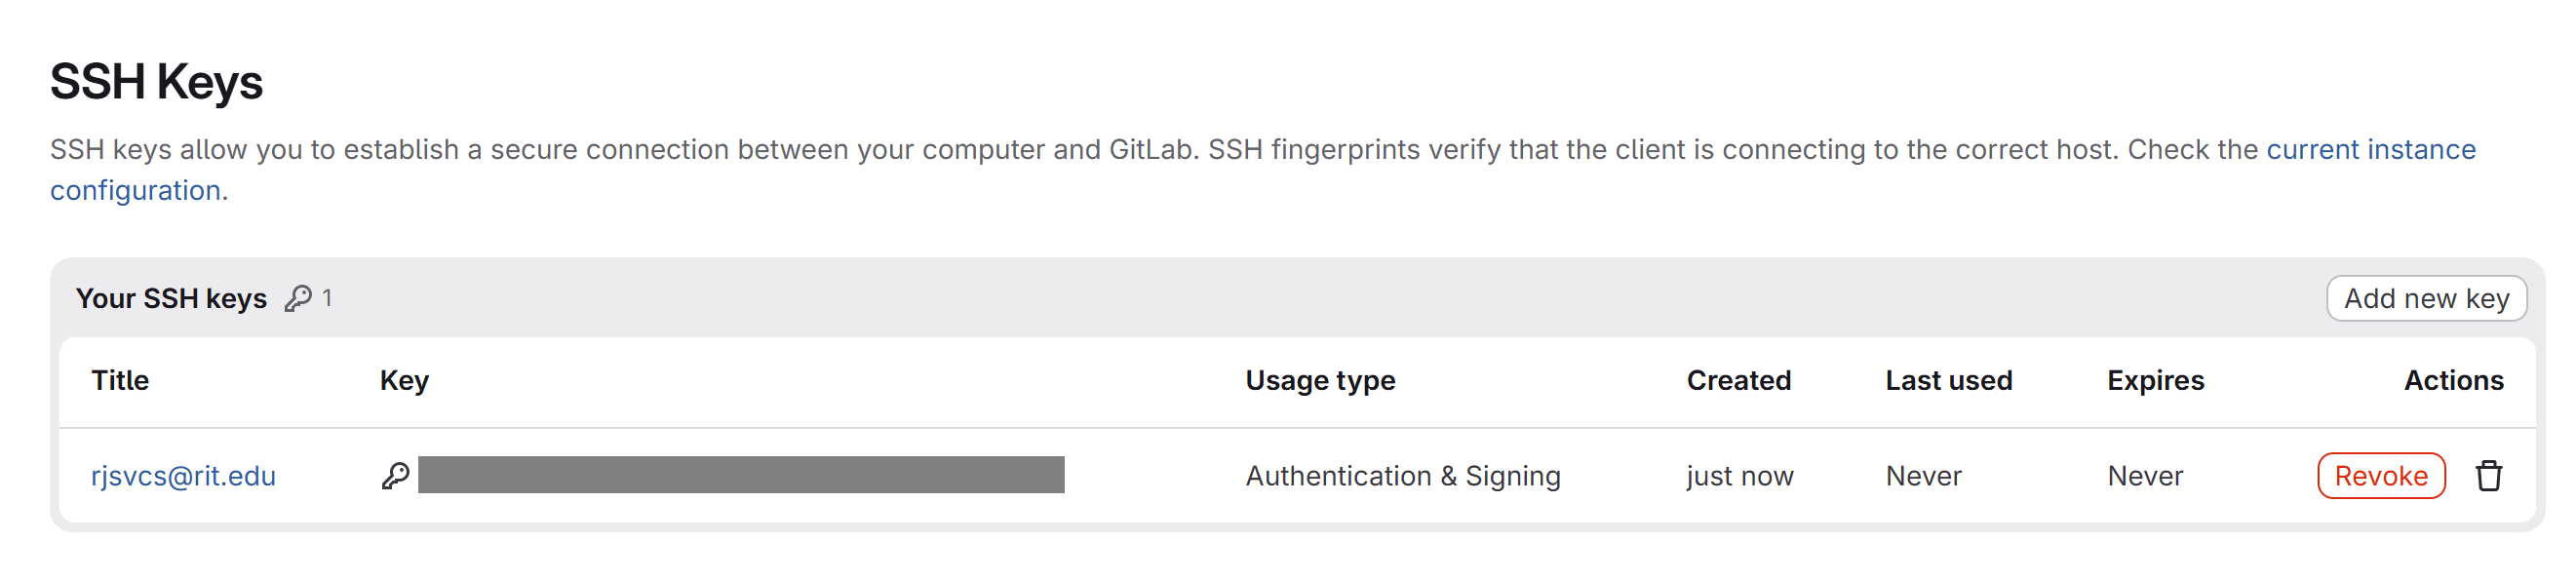
Added, and set to never expire. -
Test it: ssh -T git@git.gccis.rit.edu. You should
see a "Welcome to GitLab" message.
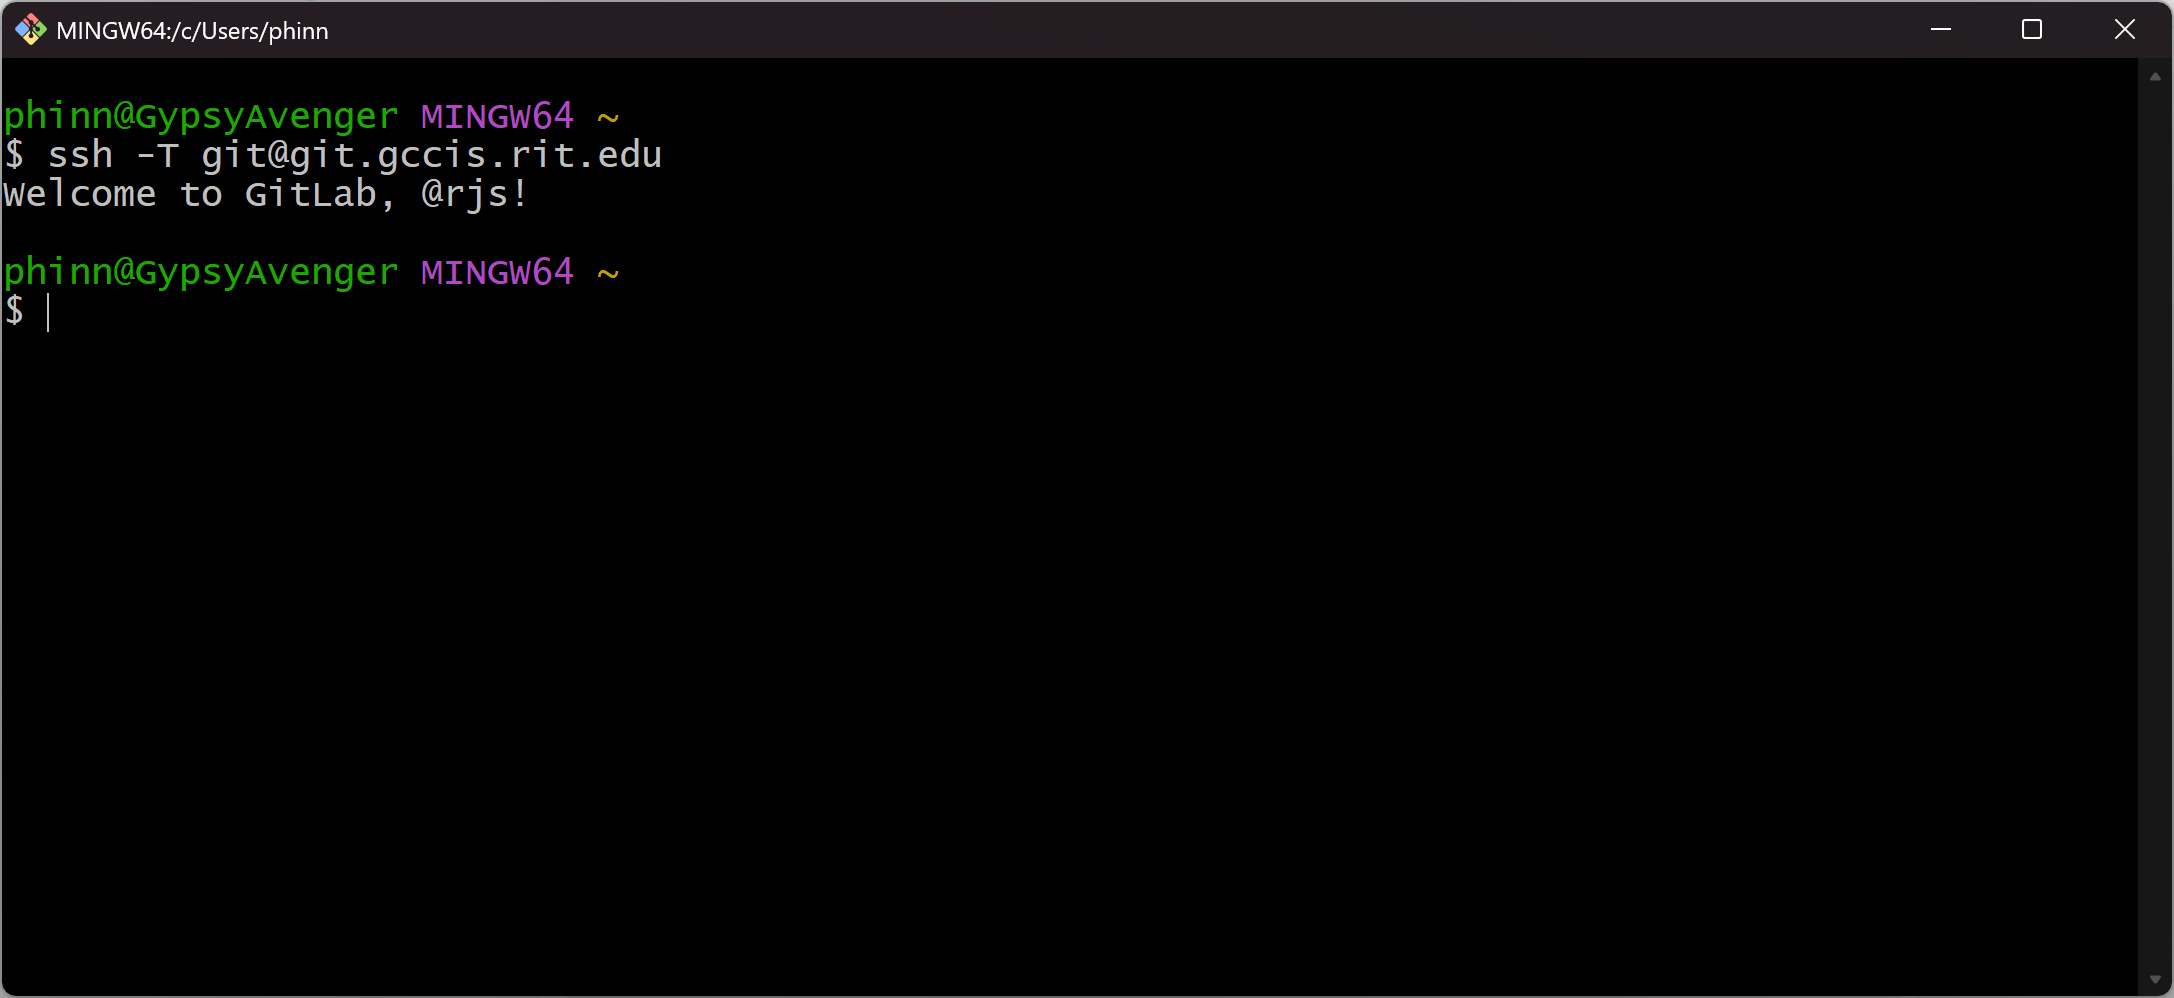
A successful test looks like this. - When cloning, use the SSH URL (starts with git@), not the HTTPS one.
Personal Access Tokens
A PAT is a long random string you generate once and use as your password whenever GitLab asks for one over HTTPS — cloning, pushing, pulling, or any tool that needs API access.
-
In GitLab, click your profile picture → Edit
profile, then in the left menu expand Access
→ Personal access tokens.
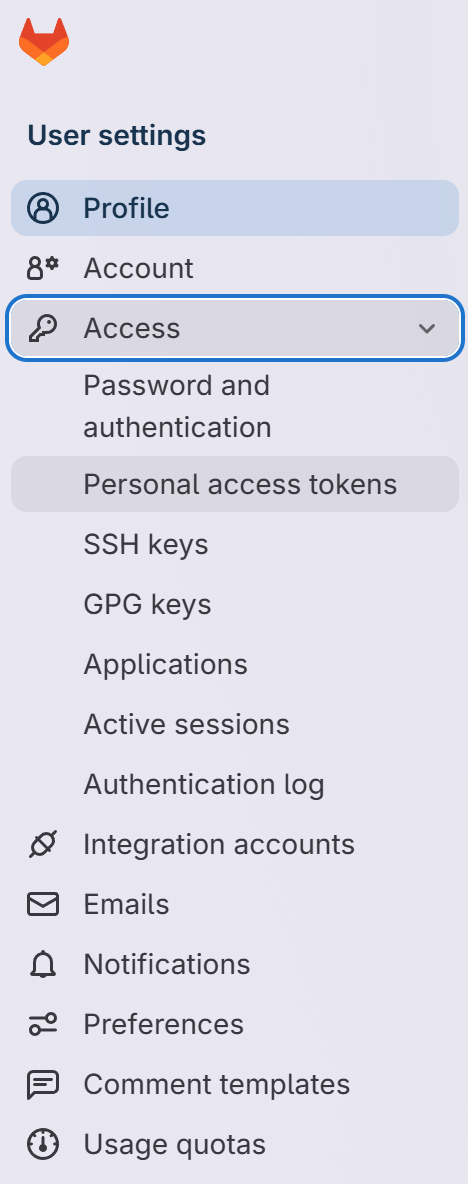
User Settings → Access → Personal access tokens. -
Click Add new token.
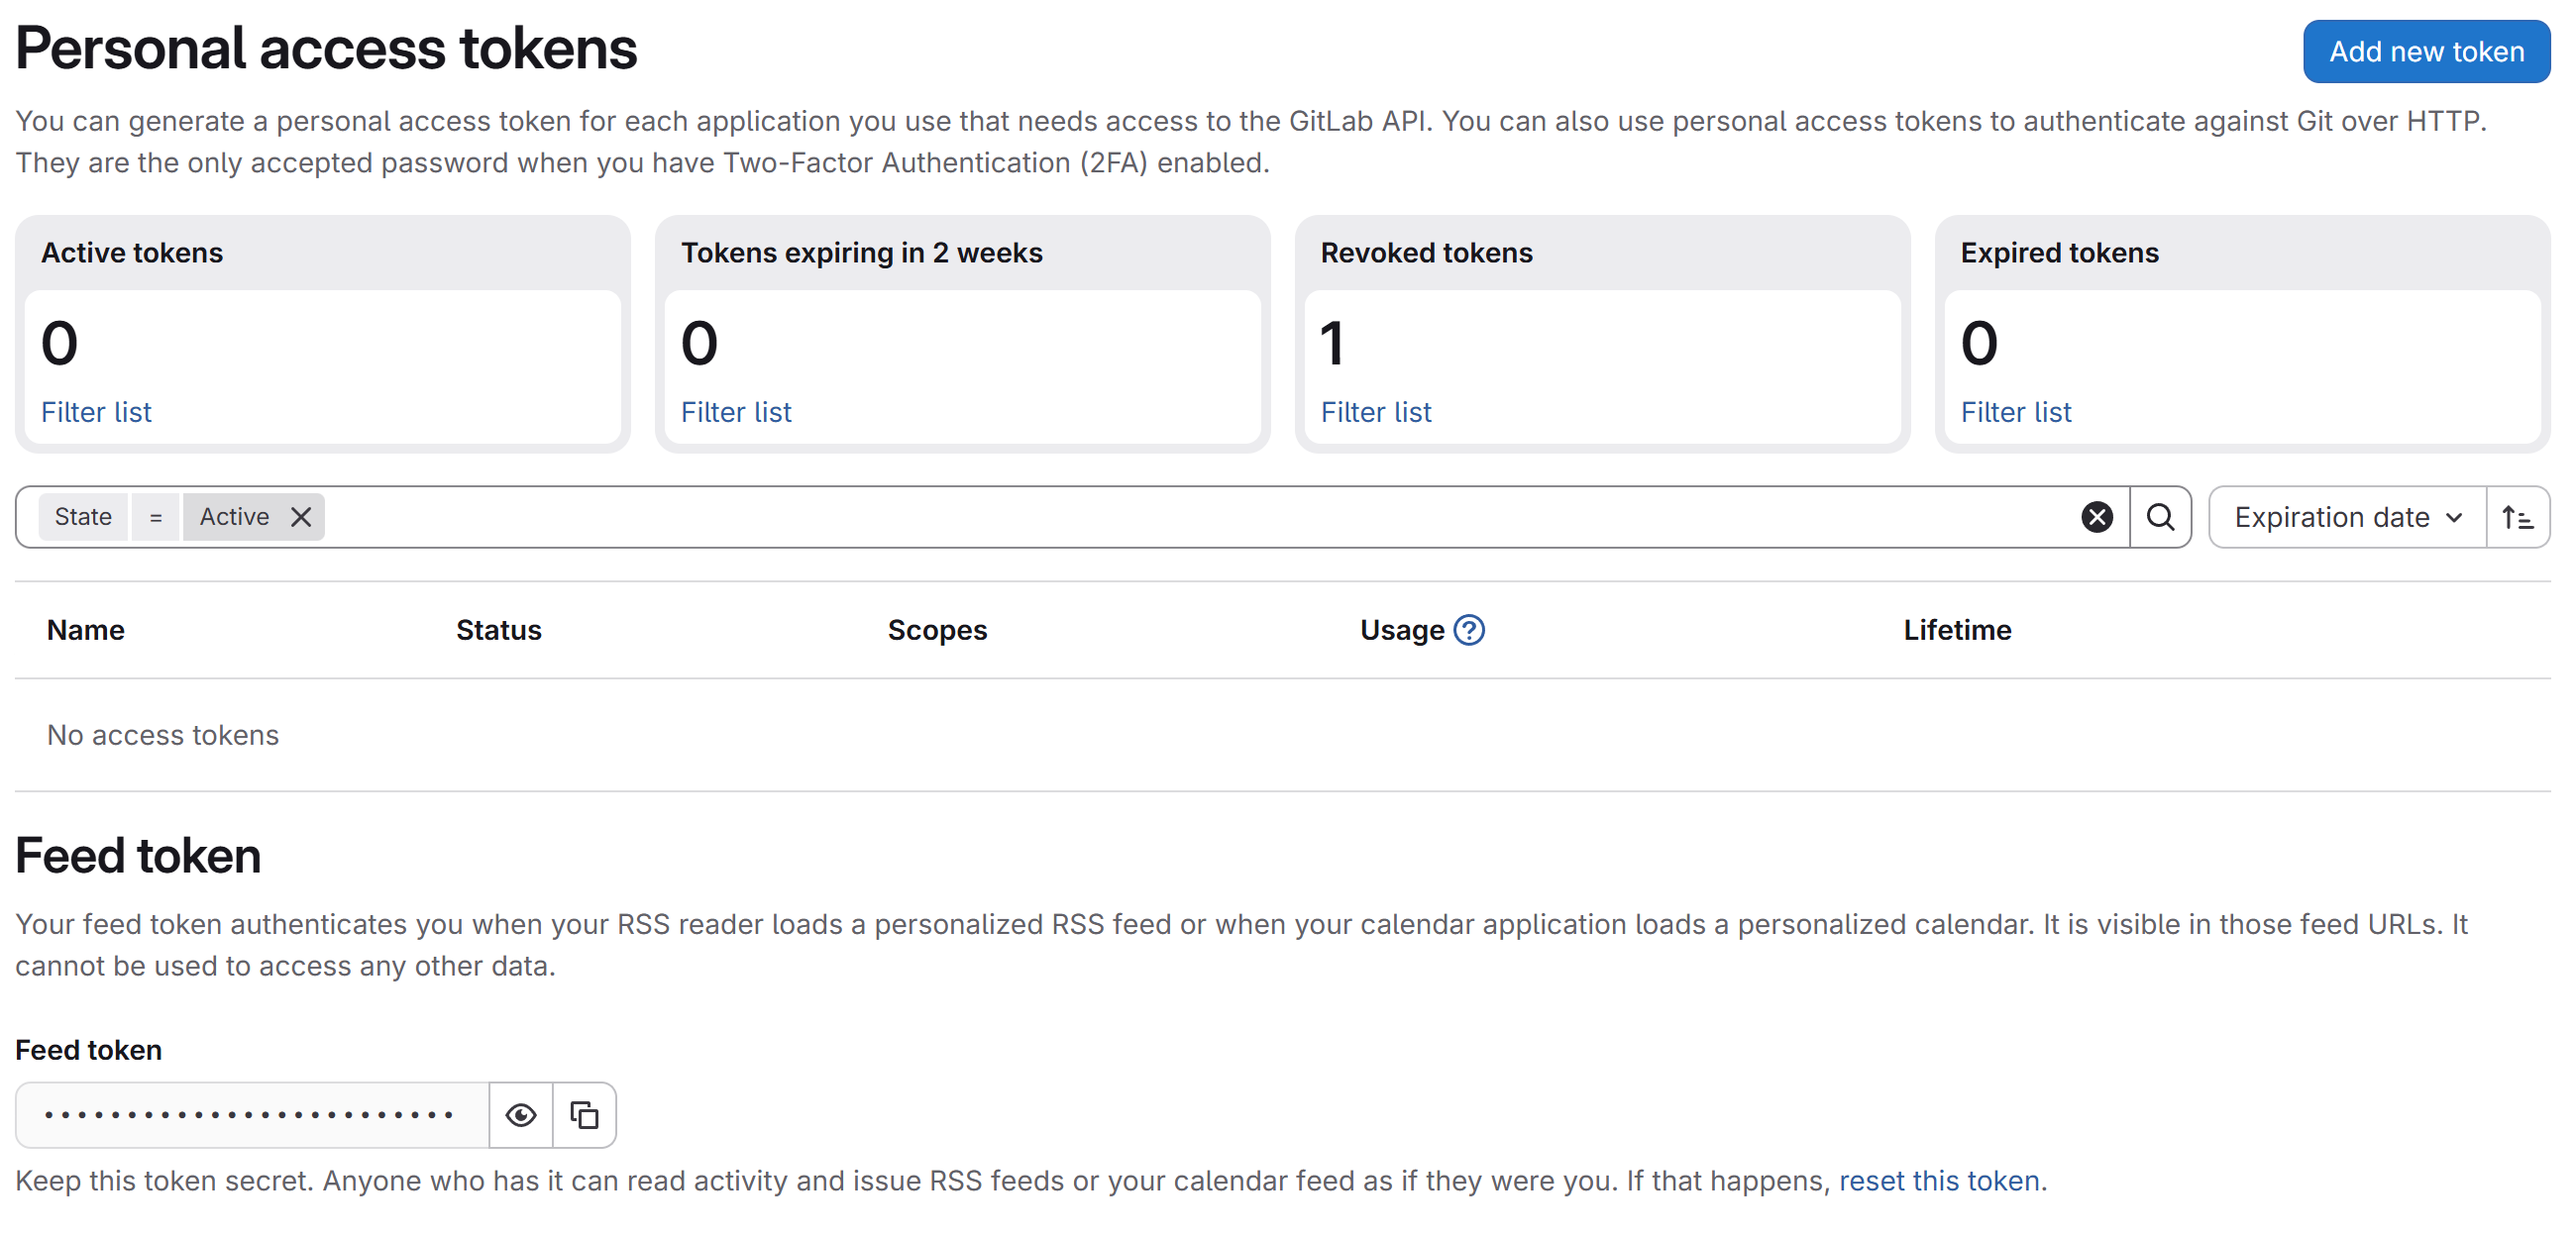
No tokens yet — click Add new token. - Give it a name. The Expiration date defaults to just one month out — change it to at least the end of the semester, or push it all the way to the maximum allowed (about a year out; you'll see "An administrator has set the maximum expiration date to..." once you hit it). Don't leave the one-month default, or you'll be locked out mid-semester and have to do this again.
-
Select scopes — nothing is checked by
default, so you'll need to check boxes yourself. For day-to-day
clone/push/pull, check at least read_repository
and write_repository. Checking additional scopes
won't hurt anything for this course, if you'd rather just check
everything.
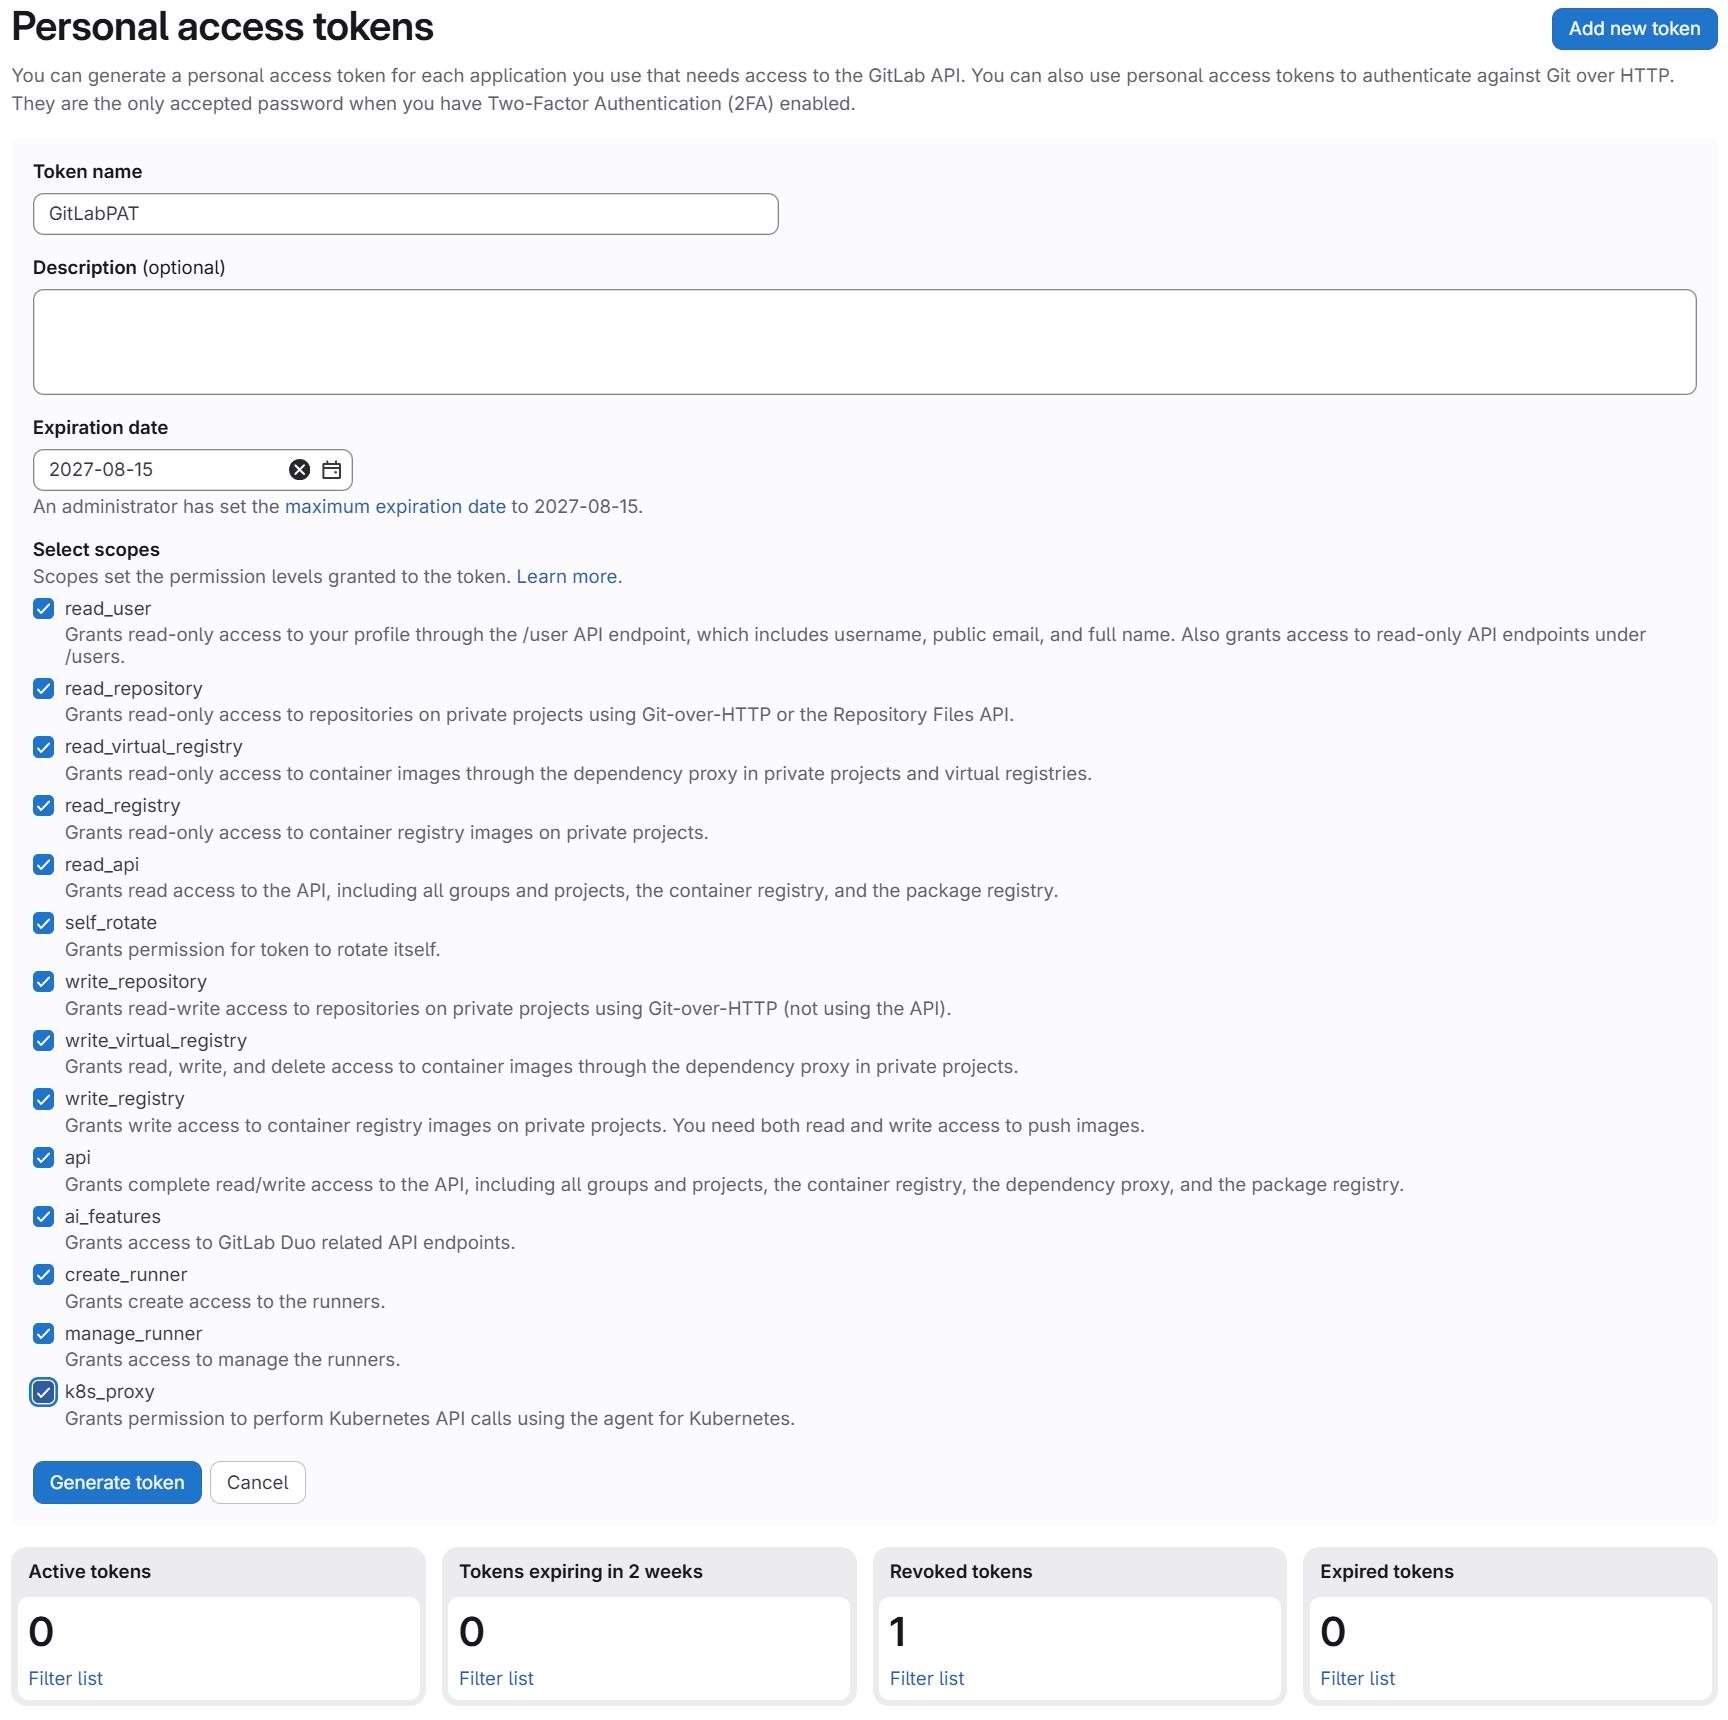
Nothing is checked by default — check at least read/write_repository. -
Click Generate token.
This is the only time you will ever be able to see or
copy this token. The moment you navigate away from this
page, it's gone for good — GitLab stores it in a form even
GitLab itself can't show you again. If you lose it, your only
option is to revoke it and generate a new one from scratch.
Copy it immediately, and put it somewhere you'll actually be able
to find it again — a text file in your Google Drive works
well. Don't rely on remembering to paste it somewhere "in a
minute."
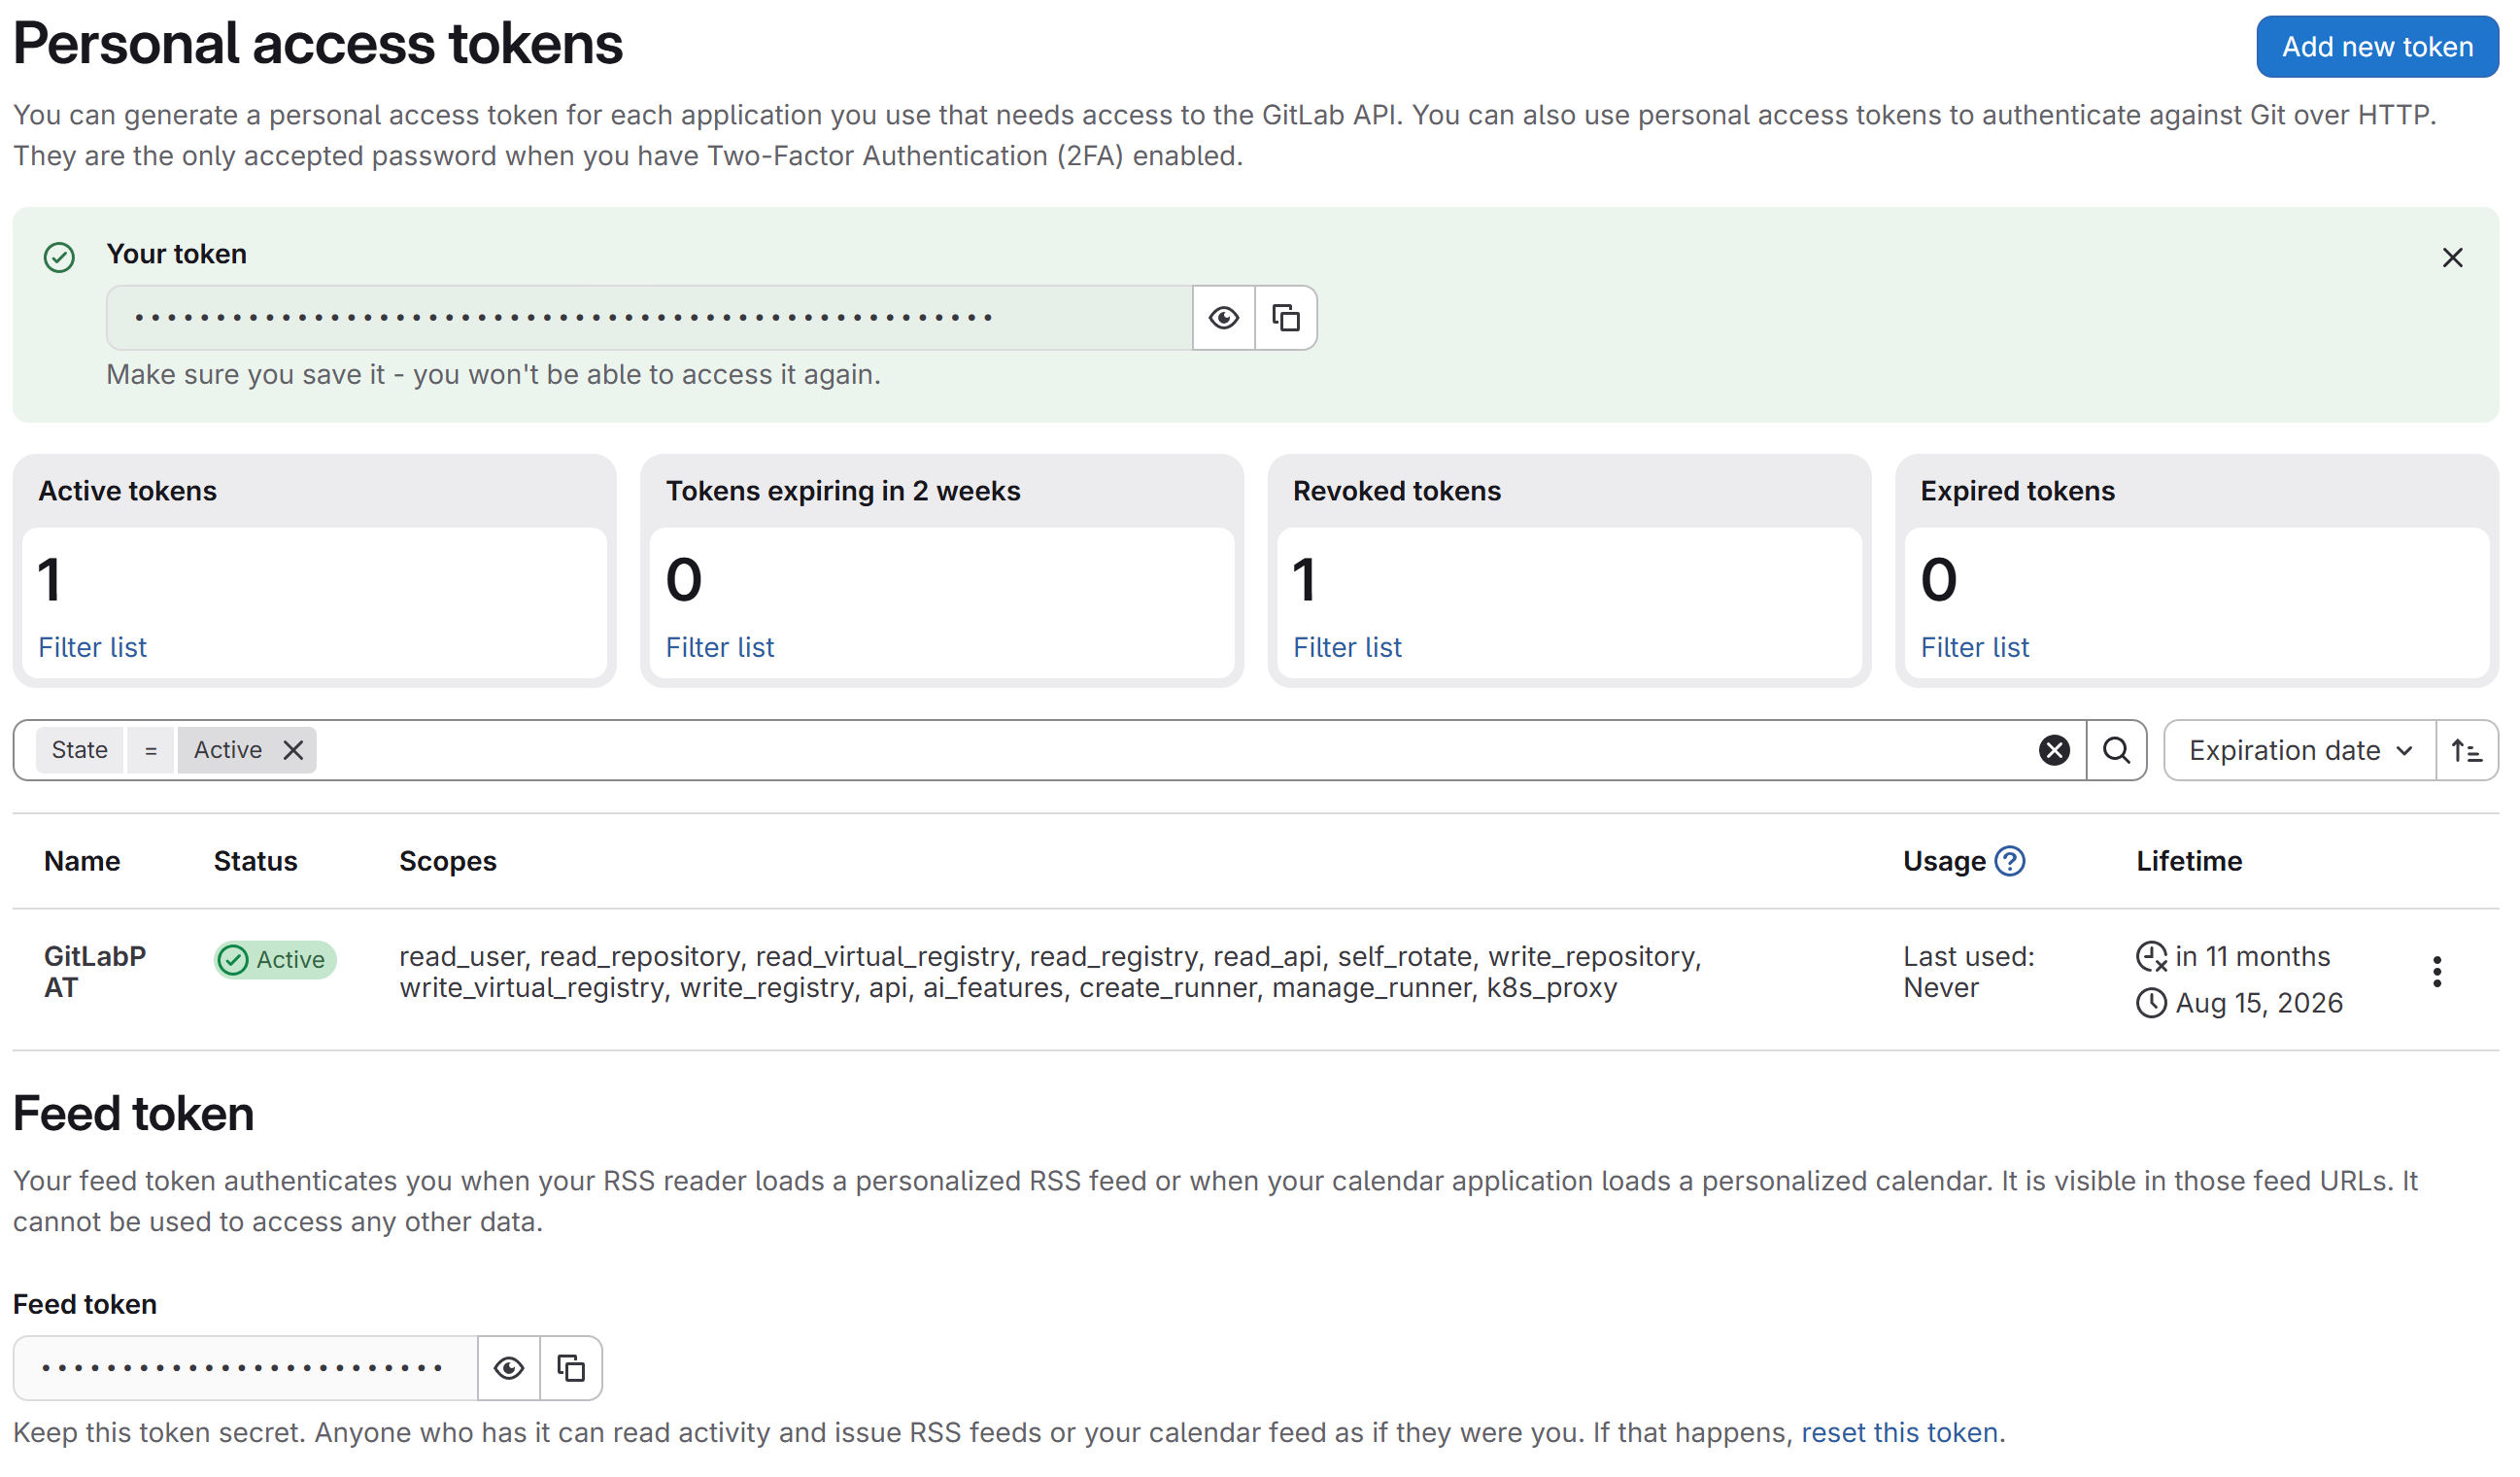
"Make sure you save it - you won't be able to access it again." This is your only chance. - When cloning with an HTTPS URL, use your GitLab username and paste the token as the password when prompted. Most git clients (and VS Code) will offer to remember it after the first time.
Which Should I Use?
- SSH key — set up once, never prompted again, works the same for every repo. The better long-term option if you're comfortable with a terminal.
- PAT — a bit faster to set up the first time, and doubles as the password some tools (like a GitLab CI pipeline) ask for directly.
- You don't need both, but it only takes a minute or two to set both up. You may find it useful to have both options depending on how you interact with GitLab.