This exercise is an introduction (refresher) to basic QNX program development. You will also experiment with the event monitoring feature, and see how to use it to measure the performance of the system.
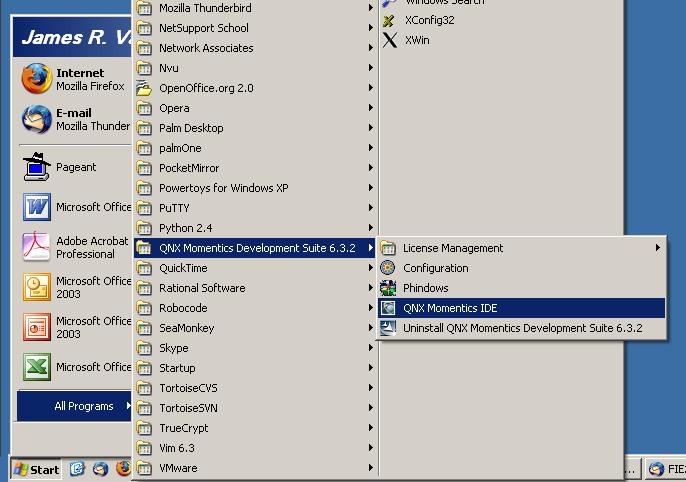
| The first step is to start up the QNX Momentics IDE. Be patient because this takes a fairly long time to get up and running. |
 |
|
|
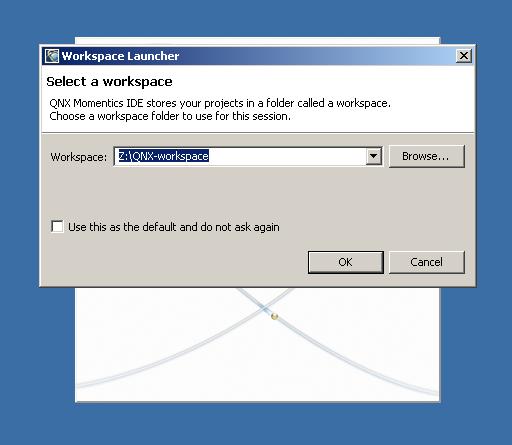
| The first time that you start Momentics, you will be asked where to place your workspace. The default puts it on the C: drive which will not work. You must change this to a directory in your Z: drive. Unless you plan on using separate workspaces, you can check the box so you will not get asked again what workspace to use. |
 |
|
|
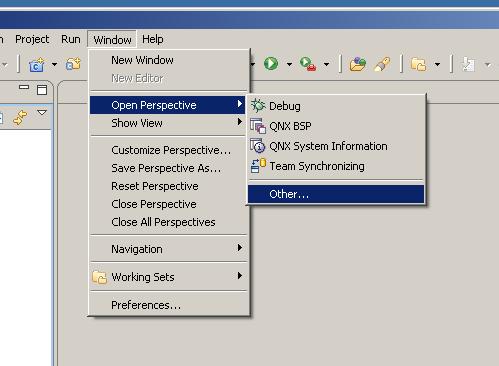
| Eclipse interface is based on "perspectives". Each perspective presents a particular layout of the IDE screen tailored for a particular activity. If Momentics does not come up in the C/C++ perspective with the C/C++ Projects view in the upper left corner, open this perspective. If it does not appear in the list of perspectives, find it under Other... This will be be perspective that you use for writing your application code. |
 |
|
|
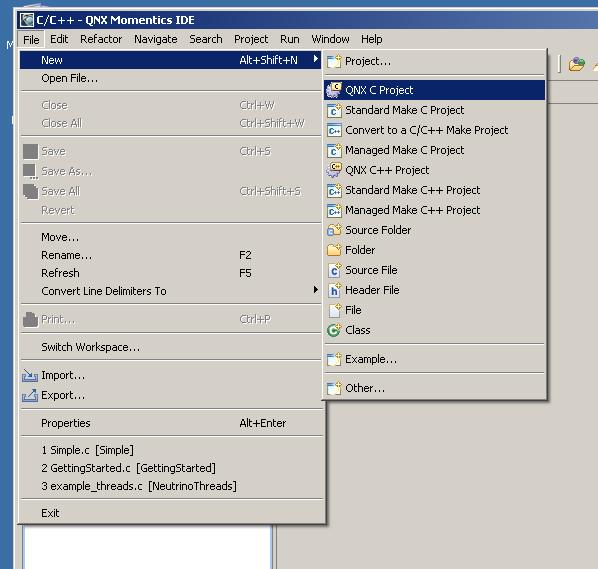
| The first step will be to create a new C project for a simple threading program. |
 |
|
|
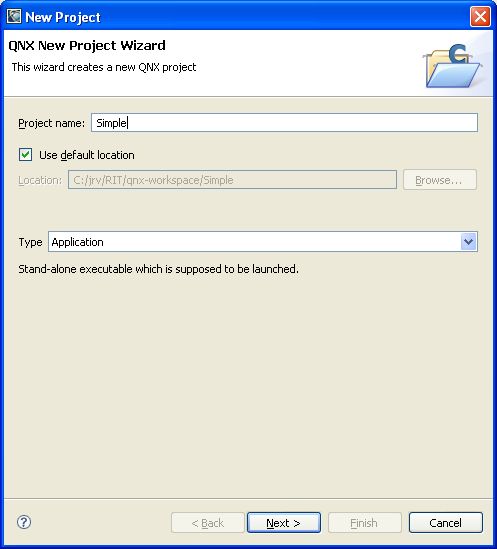
| Let's name this project Simple. It will be an Application type. You should be able to use the default location. |
 |
|
|
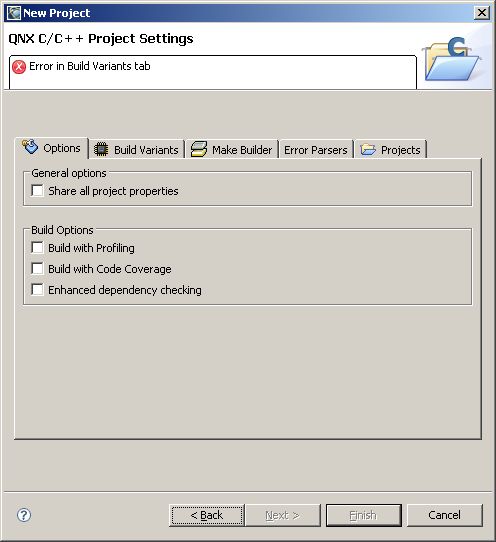
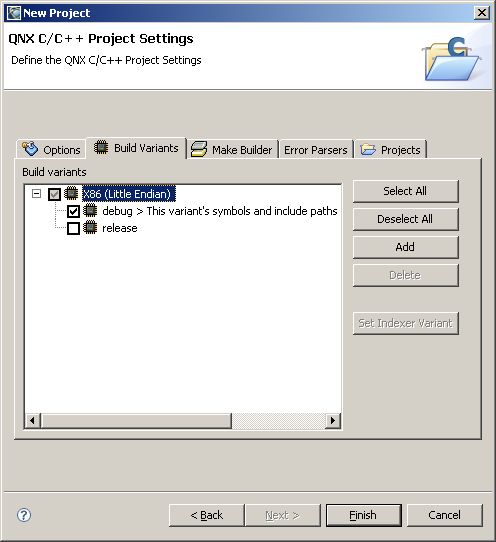
| Momentics will tell you that you have an error, even though you have barely done anything yet. Select the Build Variants tab so that this error can be cleared. |
 |
|
|
| For the work that you will do, you most likely want to be able to debug your application. Select the debug variant. You do not need the release variant, and having that variant unchecked saves time when you build your application. By default, Momentics will rebuild all variants of an application. |
 |
|
|
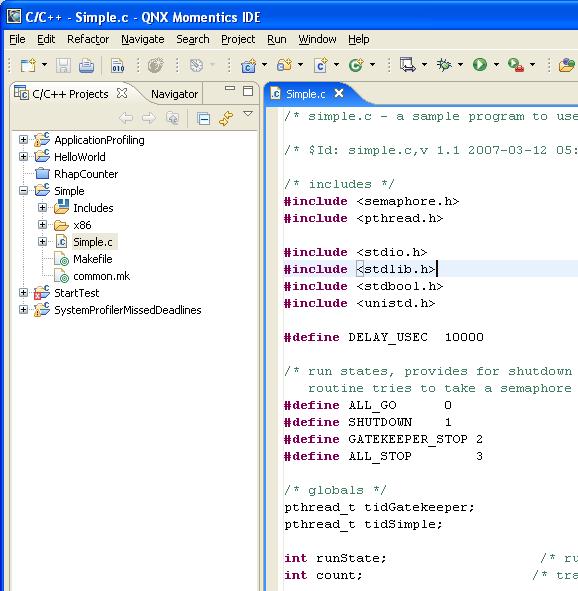
| You probably noticed that the default project is a simple "hello world" type of application. In its stock version, it can be built and run. Instead of doing that, either copy-and-paste all of the code from this Simple.c file into the default file created with the new project, or overwrite the entire file in your QNX workspace with Simple.c. |
 |
|
|
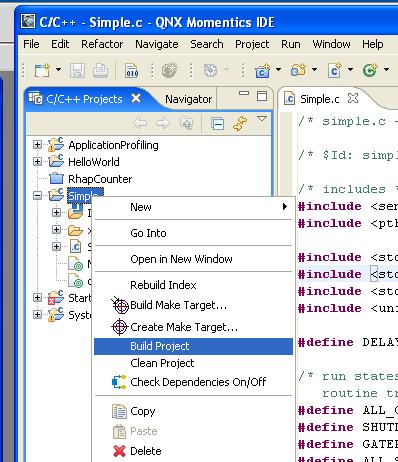
| The next step will be to build the project. |
 |
|
|
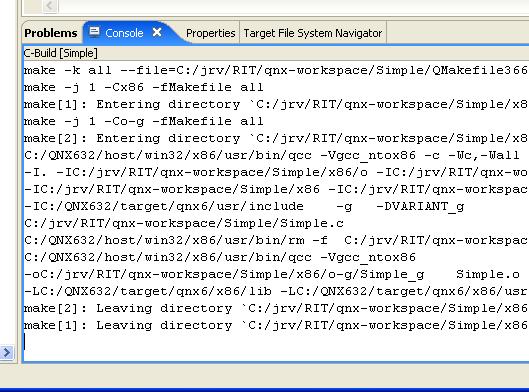
| The program should build cleanly with no errors. The progress of the build is given in the console window in the lower center area of the IDE.
Select all of this output from the build operation, and copy it into a text file. Deposit that textfile in the dropbox for the Introduction to QNX class exercise. |
 |
|
|
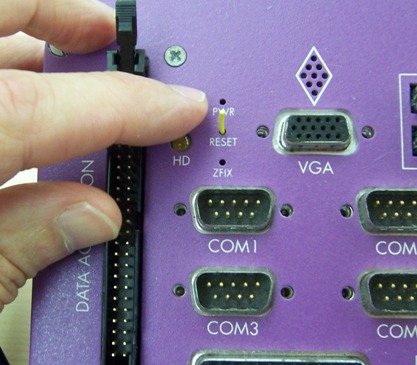
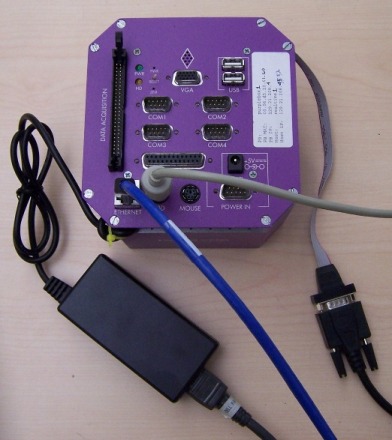
| The next step is to power up the purplebox next to your workstation. Make sure that you have a keyboard and Ethernet cable connected to the top of the purplebox, and a VGA cable attached to the end of a ribbon cable sticking out the side of the purpleboxbox. Turn on the purplebox by plugging the power cable into the purplebox's power supply. Switch to viewing the purplebox monitor by pressing the middle of the three small buttons on the lower right of the monitor. You will see the purplebox bios and QNX startup. The OS startup should end with a login prompt. Switch back to view the development system. |
 |
|
|
|
| While you are working with the purplebox targets, you will need to restart the target from time to time. The simplest way to do this is to press the fancy yellow reset button on the top of the purplebox. Any alternate approach is to cycle power on the purple box by disconnecting and then reconnecting the AC power cord from the power supply. |
|
|
|
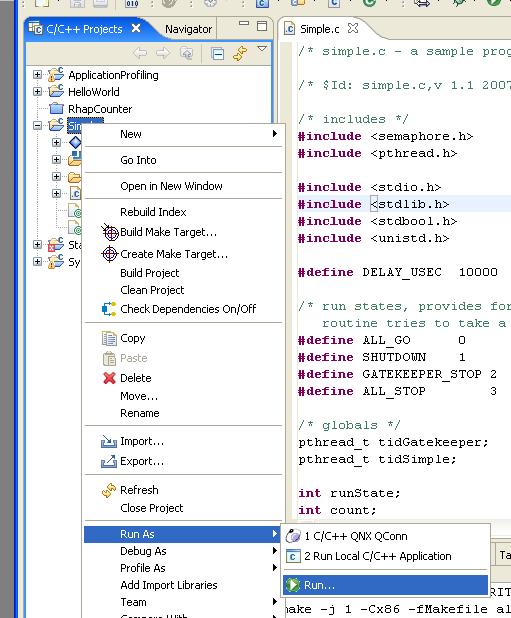
| Now you will try to download the project to the purplebox and run it. Right click on the project name in the C/C++ Projects view. Select Run As -> Run... |
 |
|
|
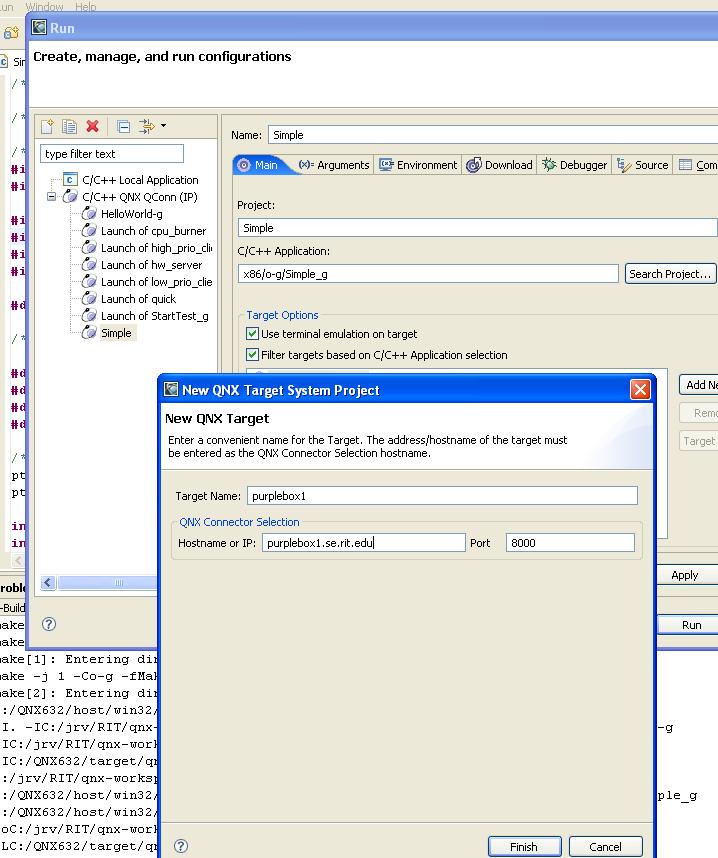
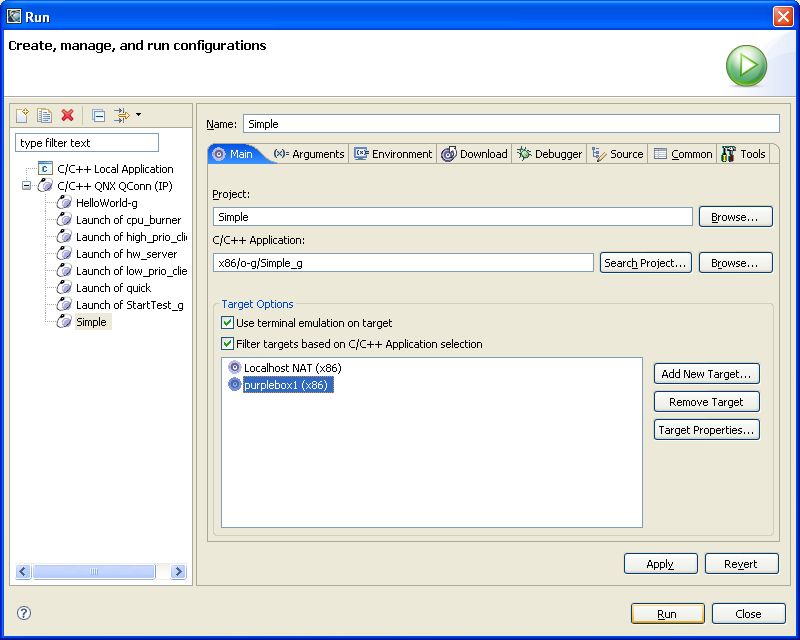
| Right click on C/C++ QNX QConn in the left pane. Select New so that you can create a new run configuration for this project. Give the configuration an appropriate name. Use Search Project... to find the debug variant of your project. Finally, you will need to specify the target on which to run the project. Press Add New Target... Specify a target name and the hostname of the target. All of the purplebox target systems are named purplebox#.se.rit.edu, where # is the number of the purplebox. The purplebox will print this during booting, and it is also printed on the white label on top of the purplebox. Click Finish to complete the target definition. |
 |
|
|
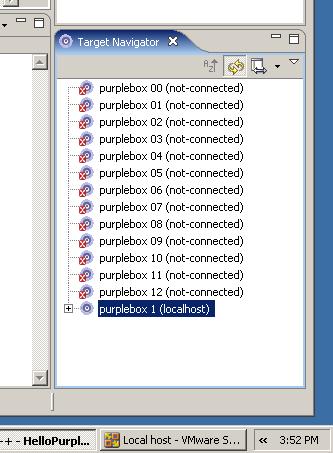
In the lower right corner of your screen, you should have a Target Navigator view. If you do not, bring it up by going to the top menu and selecting Window -> Show View -> Target Navigator. Once you defined the target it should appear as a connected target in the navigator view. |
 |
|
|
| Back on the run dialog, select the purplebox target and click Run.
As you may sit at different workstations through the term, you will need to define additional targets. Any of those targets that are turned on will appear in your Target Options window. Make sure that you choose the correct one for the workstation you are at. |
 |
|
|
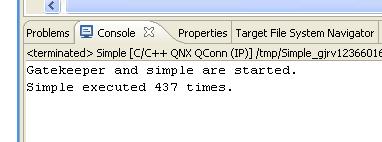
After a short period of time for downloading, the application should run on your purplebox, and the generated output will appear in the Console tab at the bottom of the Momentics window.
The Simple application will run for 5 seconds and then terminate.
You now have gone through the very basic workflow for creating and running a QNX application on our purplebox target systems. |
 |
|
|
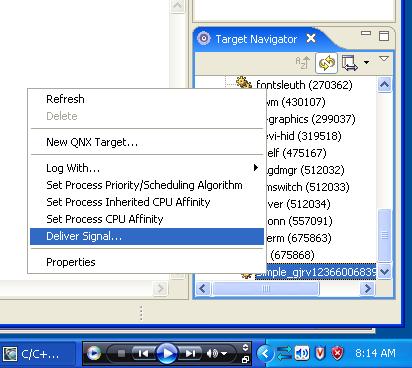
| To kill a running application which is out of control, expand the target in the Target Navigator view in the lower right corner. Right click on the application and deliver a SIGTERM signal. |
 |
|
|
| Under the Help menu item, select Welcome. Work through the System Profiler tutorial. (Note: you may need to scroll the welcome screen to see the link to the System Profiler tutorial.) The System Profiler tool will allow you to take measurements of the performance of your applications. After completing the tutorial, try to log events for your Simple application instead of the example application in the tutorial. If you have difficulty coordinating the running of the application and capturing event data, you may want to extend the running time of Simple by changing the 5 second sleep in main() to a longer period of time. |