Using code provided for FirstTimer Homework assignment, including the provided LED.c, create a command line UI that controls the red and green LEDs via the virtual UART port.
Implement all of your code in additional function(s) in additional C source file(s).
The main.c function must NOT have any application code except calls to initialization functions. After the initialization it should only call your control function which is in a different source file.
Use good modular development practices when creating your C language source files. Avoid function of over 20 lines unless the reason for more than 20 lines is a switch statement.
Important Notes:
Here are some suggestions on how to design your application control loop (Do not put this in main.c):
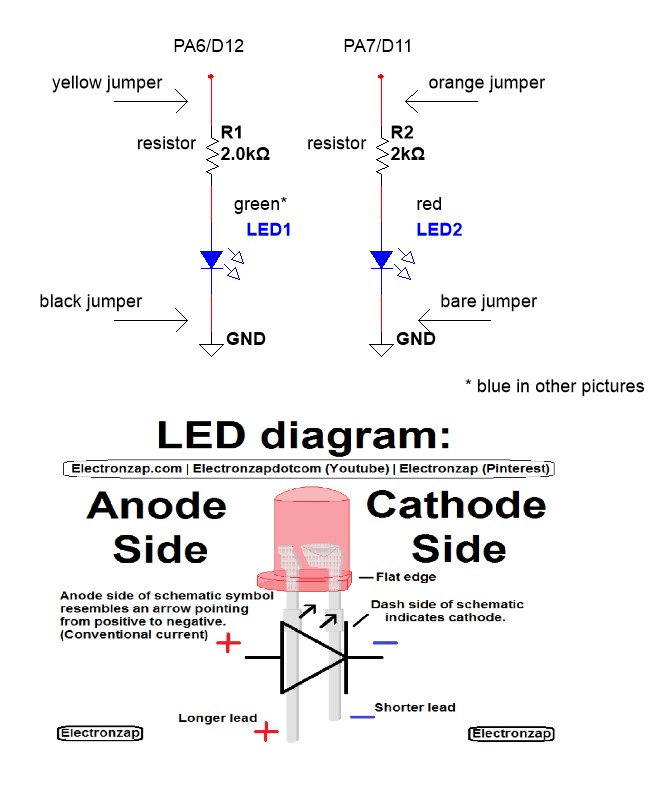
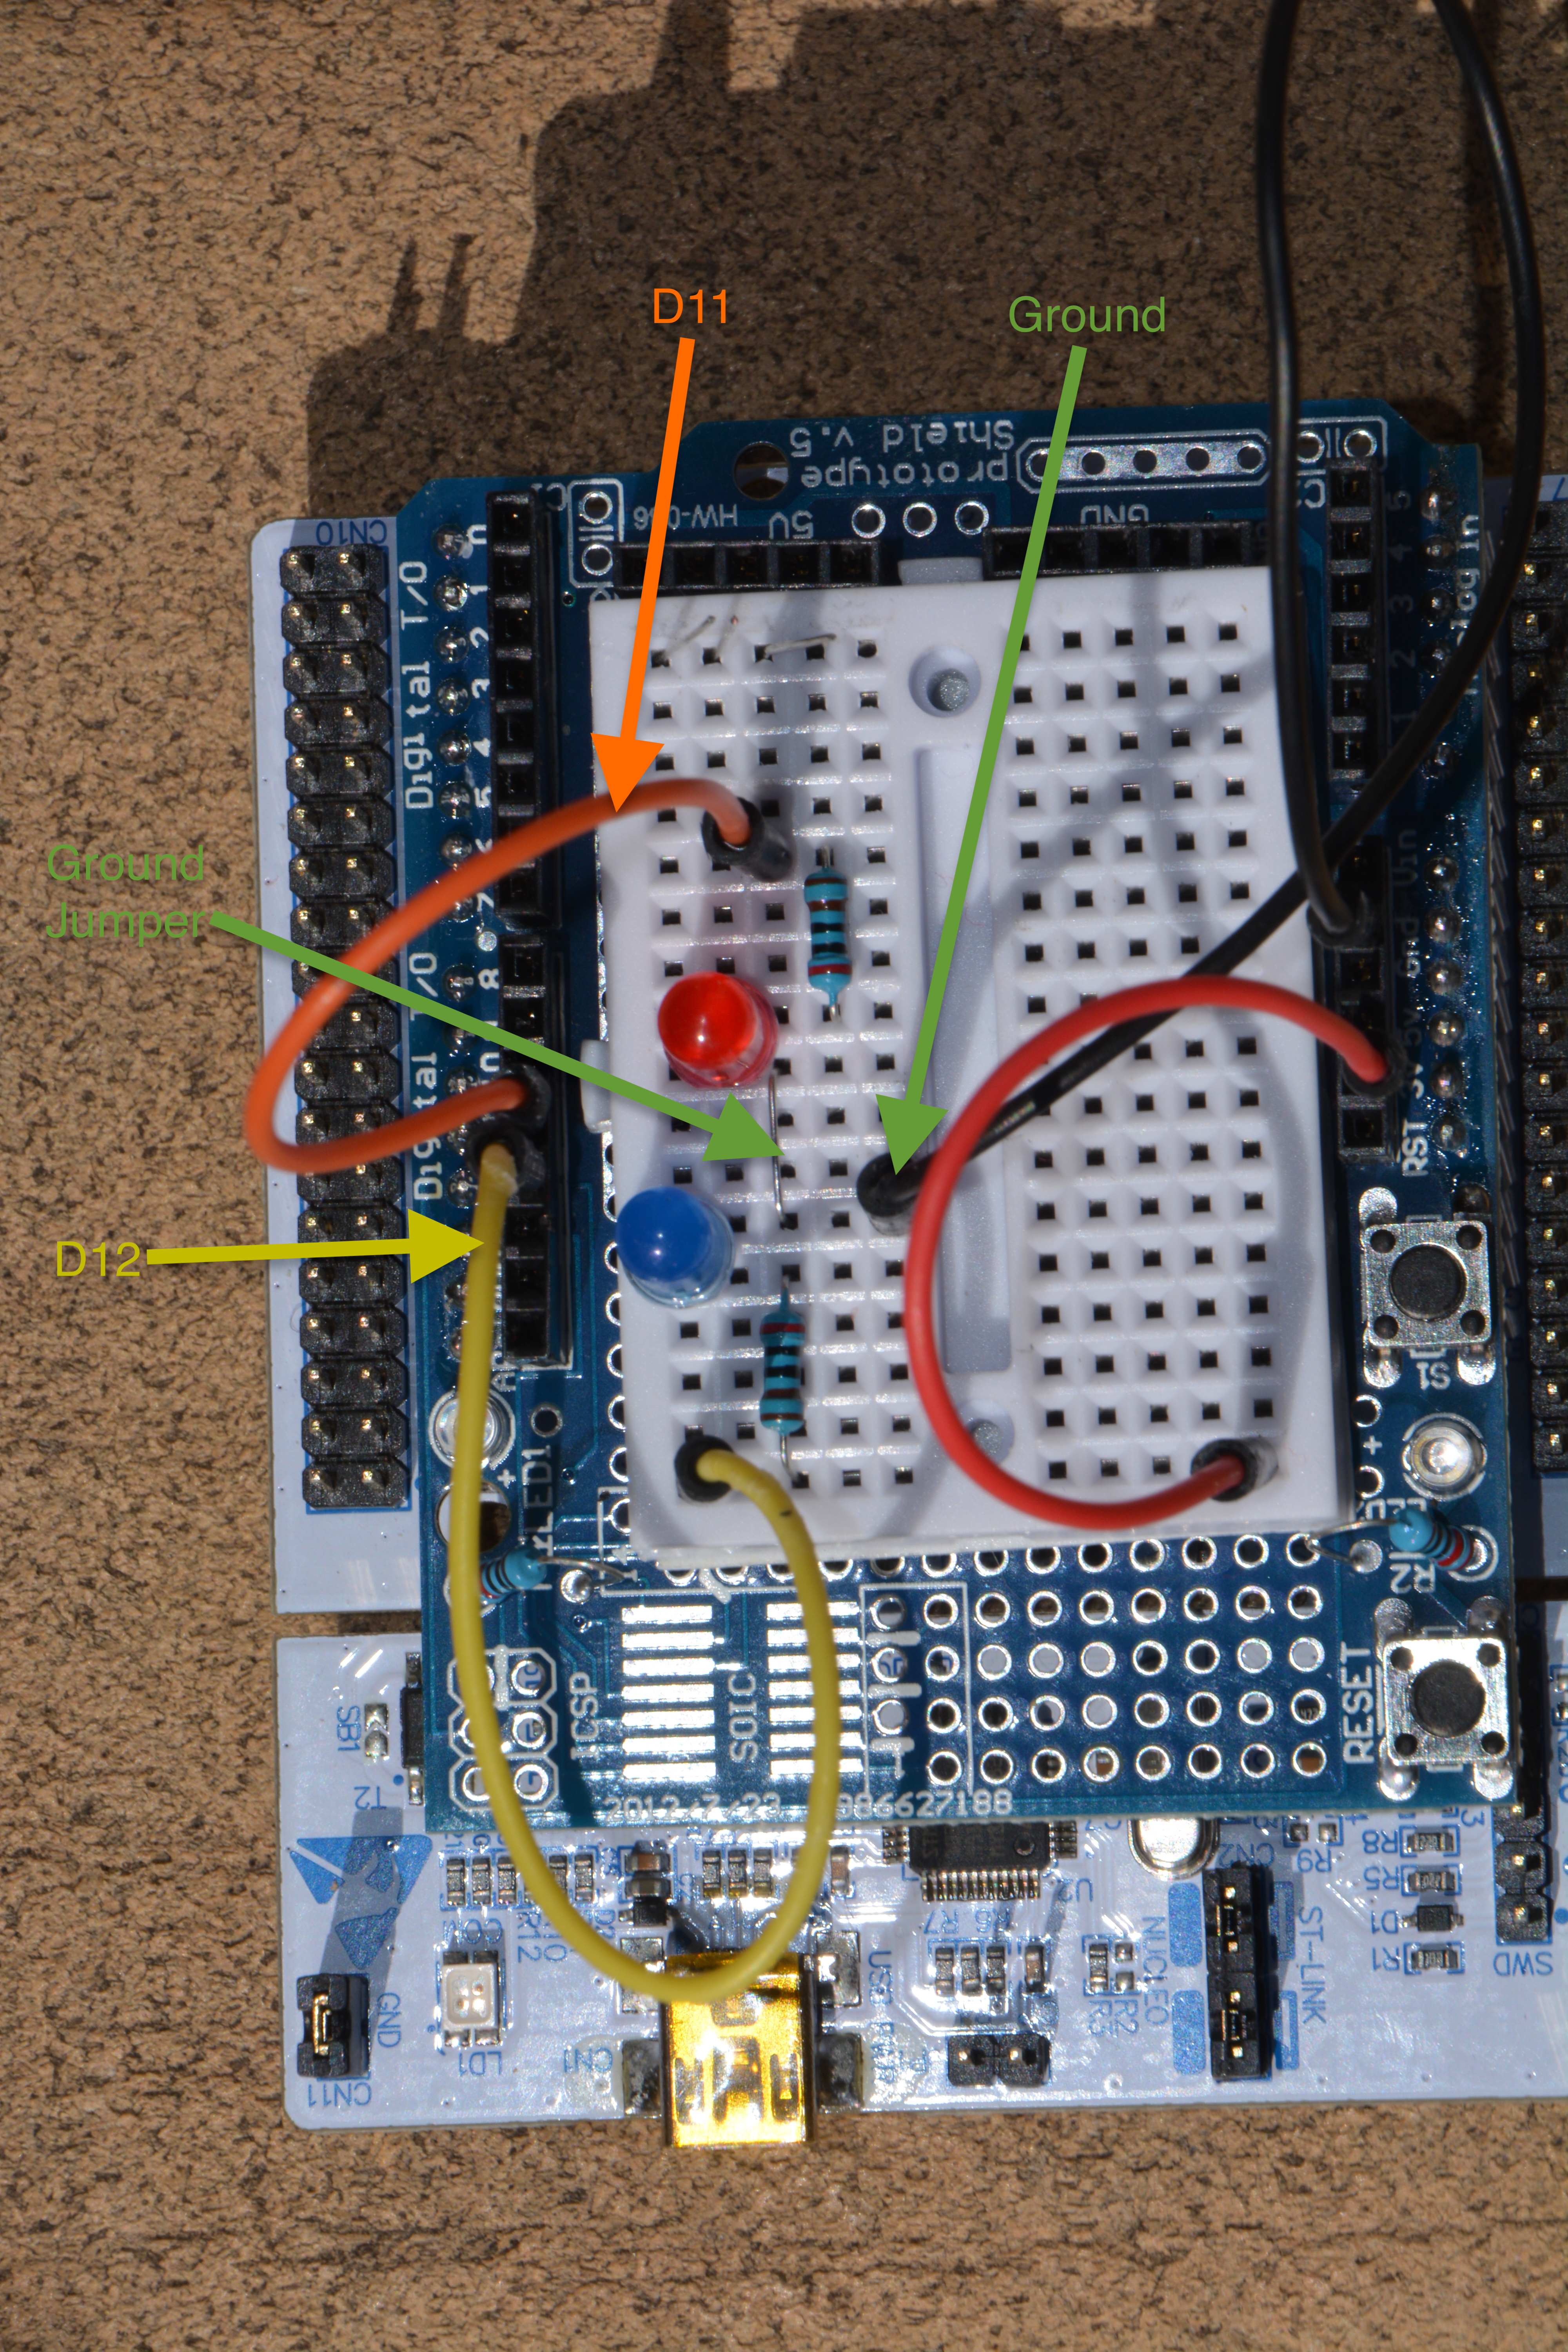
Connect the red LED to Arduino pin D11 (Nucleo PA7) and the green LED to Arduino pin D12 (Nucleo PA6).
Use a 2K or 5K resistor in series with the LED to limit the current flowing through the LED.
Submit your UART LED Src and Inc directories in a Src.zip and a Inc.zip archives to the UART LED project Part 1 myCourses Assignment folder
Include a statement in your submission indicating which tests in the demo sheet pass when done in the specified order.
Be sure that your software works correctly by precisely following the steps in Demo Sheet. You must do the whole set of tests in order.
Be sure to address all warnings!
100 possible points as described in the Grading Sheet.
All projects must be submitted on-time. 5% penalty may be applied for any late submissions.